HA Prerequisites:
- All devices in device group are running the same version of BIG-IP system software.
- Configure NTP and verify that both devices show same date and time.
You must perform this task locally on each device in the device group.
Step 1: Create dedicated VLAN and Self IP for HA:
Here we have chosen interface 1.1 for HA function and a cross network cable is connected back to back between both F5 devices. Keep VLAN configuration exactly as below, as untagged interface.
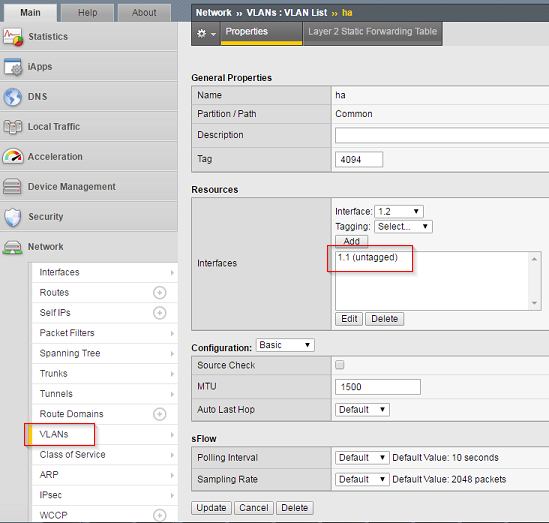
I have chosen an unused subnet 192.168.255.1/24 for HA heartbeat to work. You now configure active device as 192.168.255.1 and peer as 192.168.255.2. Make sure you configure these Self IPs as non-floating.
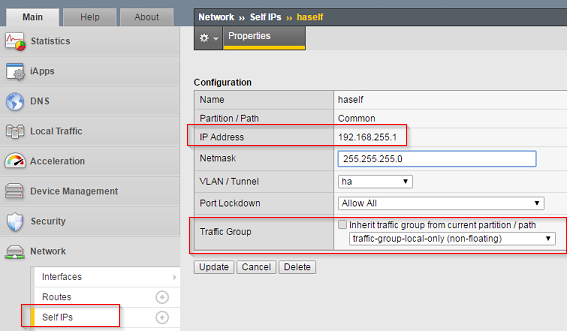
On the peer device, configure similar HA VLAN and IP address as 192.168.255.1
 Starts at 30$ per month
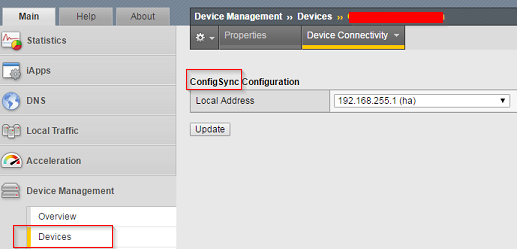
Step 2: Configure ‘config sync’:
Specify IP address that is used to synchronize their configuration objects by other devices in the device group to the local device.
- Click Device Management > Devices
- Click device name to which you are currently logged in.
- Under Device Connectivity menu, choose ConfigSync
- Choose the self IP address configured earlier and Update. This address must be a non-floating self IP address and not a management IP address. In v10, you were able to choose Management address, however on v11 onwards, you cannot choose it.
On the peer device, choose 192.168.255.2 (ha) for Config Sync.
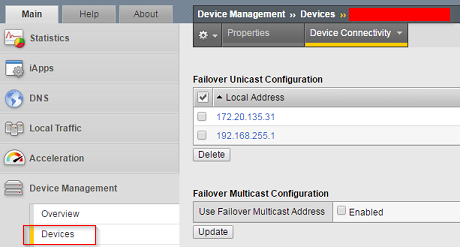
Step 3: Configure ‘Failover’ communication:
Specify the local IP addresses that you want other devices in the device group to use for continuous health-assessment communication with the local device.
- Click Device Management > Devices
- Click name of the device that you are currently logged in
- From Device Connectivity menu, choose Failover
- Click Add for each IP address on this device that other devices in the device group can use to exchange failover messages with this device.
Type a self IP address associated with an internal VLAN (preferably VLAN HA) and the management IP address ( its 172.20.135.31). When the device reboots, Management IP becomes active first before Self IPs, hence to avoid both devices operate as active and cause unexpected results, we add management IP on the heart beat list.
On the peer device, choose 192.168.255.2 (VLAN HA) and 172.20.135.32 (management IP address).
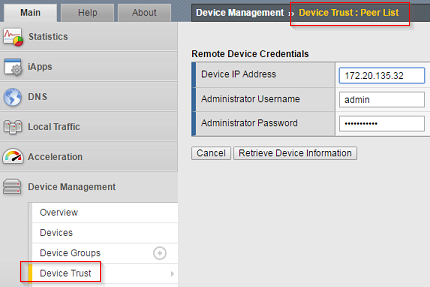
Step 4. Establish Device Trust:
Now you are going to add the peer device on the trusted device list. Before that, you set and force the peer device to be Offline. Login to ‘peer’ device, choose Devices, select the listed device and click Force Offline.
Now come back to active device,
- Click Device Management > Device Trust > Peer List > Click Add
- Type IP address 172.20.135.32, username and password of the remote BIG-IP device with which you want to establish trust.
- Click Retrieve Device Information
- Verify name of remote device is correct and click Finished.
On the peer device, perform same steps and specify device IP address as 172.20.135.31
Step 5: Create Sync-Failover device group:
If an active device in a Sync-Failover device group becomes unavailable, the configuration objects fail over to another member of the device group and traffic processing is unaffected. You perform this task on any one of the authority devices within the local trust domain.
- Click Device Management > Device Groups > Click Create
- Type name of the service group
- Choose group type as Sync-Failover
- Add all available members that you want to include in sync-failover device group.
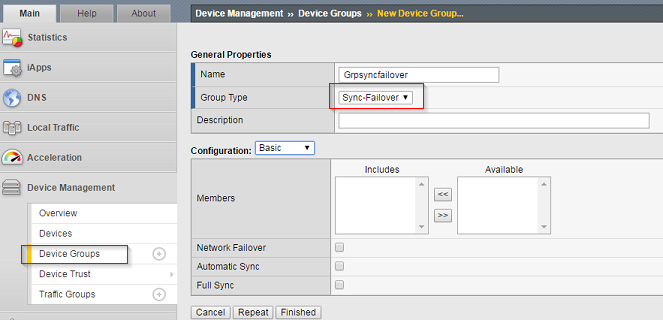
Network Failover: You must enable network failover for any device group that contains three or more members. Select the checkbox if you want device group members to handle failover communications by way of network connectivity. Clear the check box if you want device group members to handle failover communications by way of serial cable (hard-wired) connectivity.
Automatic Sync : F5 recommends that you manually sync the configuration changes to peer device so if you accidentally misconfigured your active device, you can quickly sync and recover the configuration from peer device. So keep this unchecked.
Full Sync: Select the check box when you want all sync operations to be full syncs. In this case, the BIG-IP system syncs the entire set of BIG-IP configuration data whenever a config sync operation is required.
Clear the check box when you want all sync operations to be incremental (the default setting). In this case, the BIG-IP system syncs only the changes that are more recent than those on the target device. When you select this option, the BIG-IP system compares the configuration data on each target device with the configuration data on the source device and then syncs the delta of each target-source pair.
If you enable incremental synchronization, the BIG-IP system might occasionally perform a full sync for internal reasons. This is a rare occurrence and no user intervention is required.
- Click Finished.
Step 6: Sync configuration to the device group: This task synchronizes the BIG-IP configuration data from the local device to the devices in the device group.
When synchronizing self IP addresses, the BIG-IP system synchronizes floating self IP addresses only. Except for non-floating self IP addresses, the entire set of BIG-IP configuration data is replicated on each device in the device group.
- Click Device Management > Overview
- In the Devices area of the screen, in the Sync Status column, select the device that shows a sync status of Changes Pending.
- Click Sync Devices to Group
- Click Sync
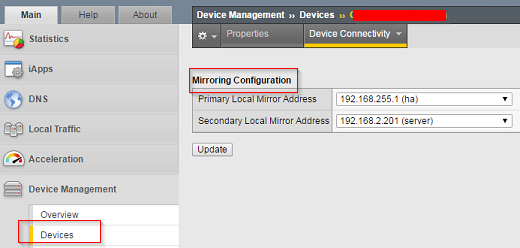
Step 7: Configure Network mirroring (Connection mirroring):
When an active unit becomes unavailable, the connections are dropped unless you have configured network mirroring. Network mirroring feature on the BIG-IP system duplicates a units state (that is, real-time connection and persistence information) on the peer unit.
- Click Device Management > Devices
- Click device name to which you are currently logged in.
- Under Device Connectivity menu, choose Mirroring
- The recommended IP address is the self IP address for either VLAN HA or VLAN internal.
- The secondary Local Mirror address is optional. The system uses this IP address in the event that the primary mirroring address becomes unavailable.