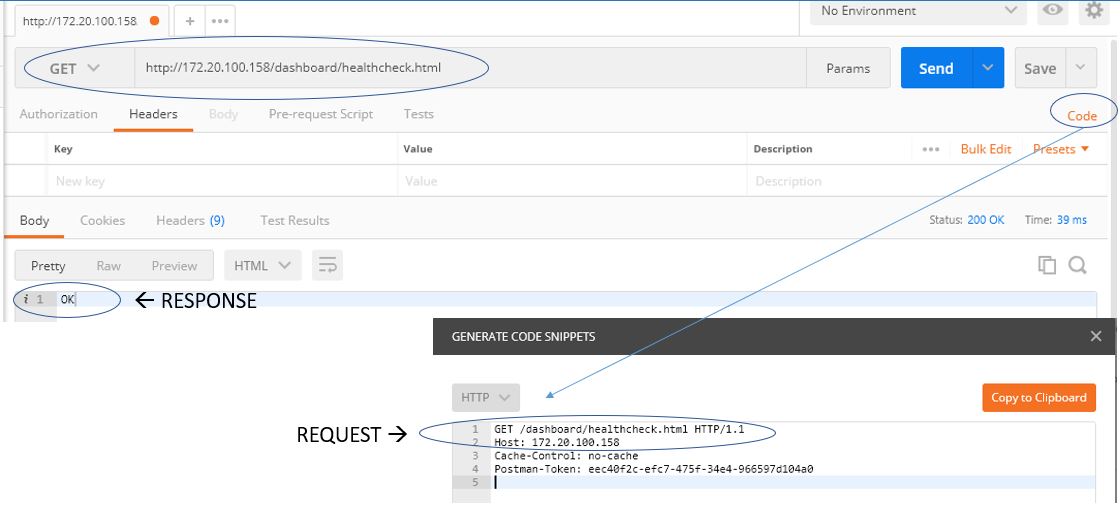
Before we begin configuring the HTTP Monitor, use POSTMAN (or your favorite HTTP sniffer tool) to understand REQUEST (Send String) and RESPONSE (Receive String) pair of the health check page.
SEND STRING
In this example, when client browser browse the health check web page /…/healthcheck.html, the client sends following request to server
GET /dashboard/healthcheck.html HTTP/1.1
Host: 172.20.100.158
You slightly modify the request according to language understand by F5 appliance by adding /r/n (/r is line feed and /n is carriage return), so SEND STRING would be
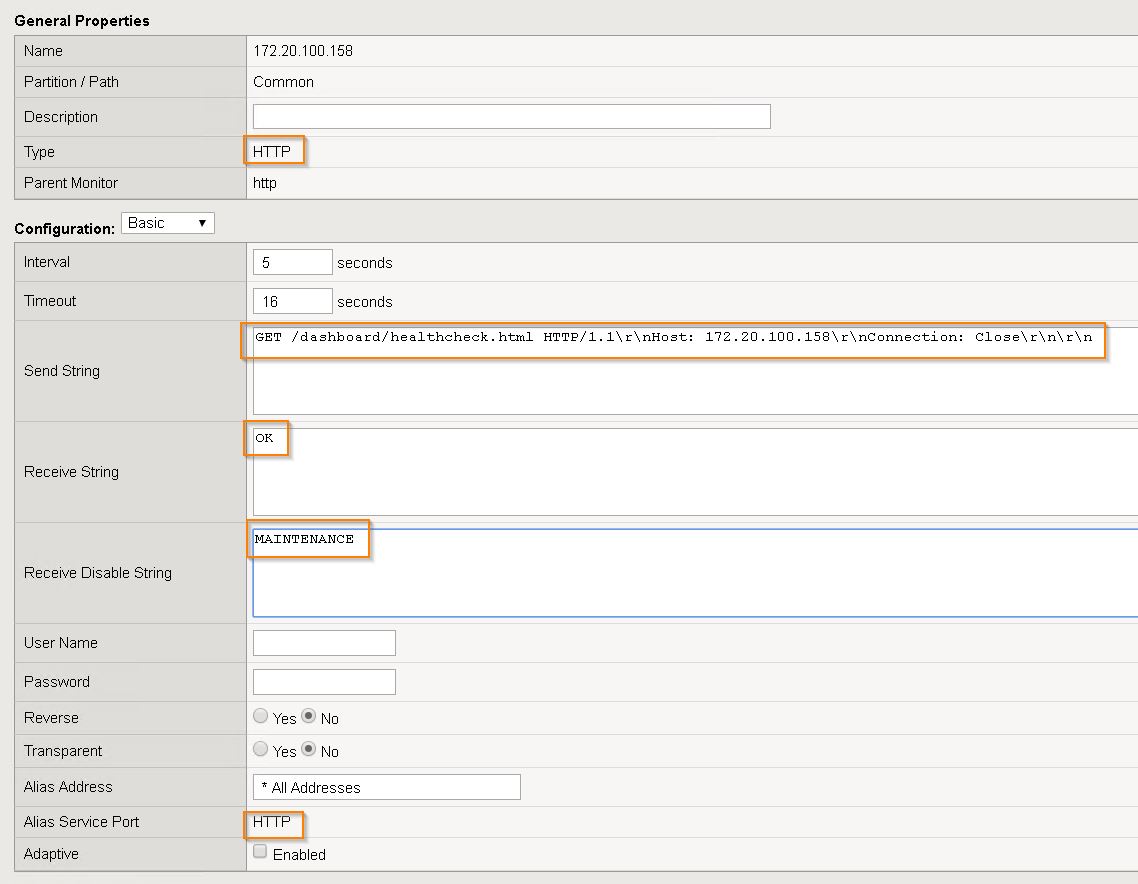
GET/dashboard/healthcheck.html HTTP/1.1\r\nHost:172.20.100.158\r\nConnection: Close\r\n\r\n
RECEIVE STRING
If RECEIVE STRING is matched, F5 marks the node as UP. In this example, the response for the above request made is OK. so RECEIVE STRING would be either simply as
OK
or you can add return code in the receive string
HTTP/1.1 200 OK
RECEIVE DISABLE STRING
If RECEIVE DISABLE STRING is matched, F5 marks the node as DISABLE. During DISABLE state, F5 denies new connections and allows existing connection until they are completed or timed out.
MAINTENANCE
So when we combine all together, the configuration would like as

 $2.75 per month