Step 1: Create a Slack App:
1.Go to the Slack API website (api.slack.com) and sign in with your Slack workspace credentials.
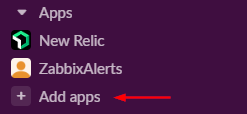
2. Click on “Add Apps”
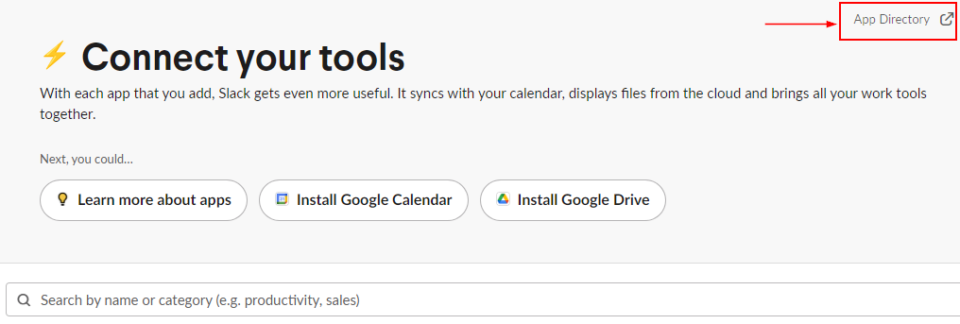
3. Click on “App Directory”
 $2.75 per month
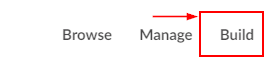
4. Click on “Build”
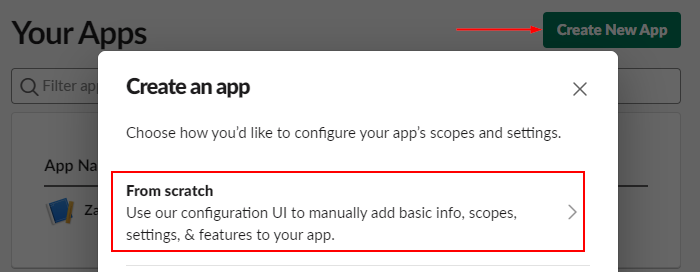
5. Click on “Create New App” then choose “From scratch” option
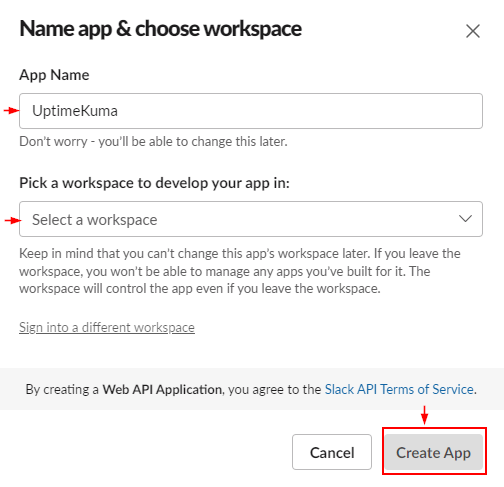
6. Mention App Name and pick Workspace
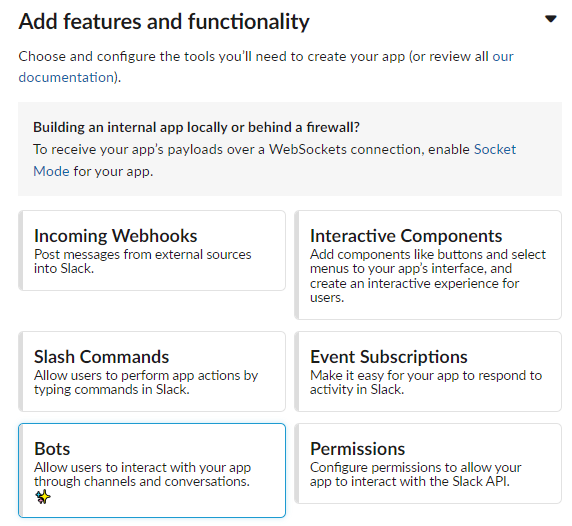
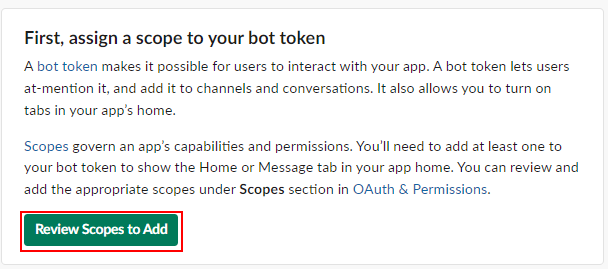
7. Click on Bots then click Review Scopes to add in the next screen
8. Navigate to the Scopes section and choose Add an OAuth Scope.
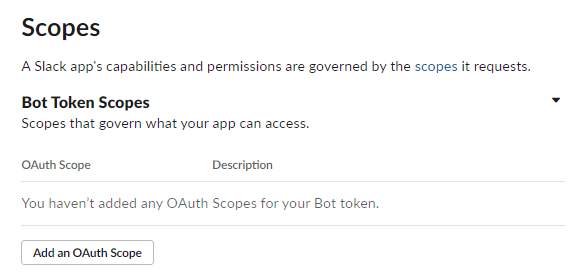
9. Choose chat:write
 Starts at 30$ per month
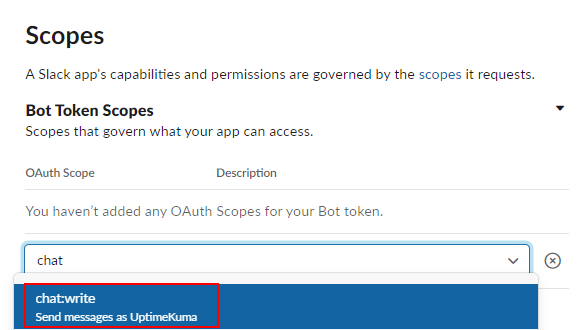
10. Scroll up and click on “Install to Workspace“
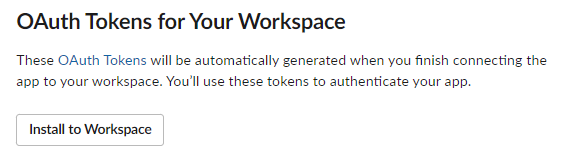
11. Click on “Allow” in the permission screen
12. In the “OAuth & Permissions” section, you’ll find an OAuth Access Token. Copy OAuth token as you’ll need it later to configure Zabbix.

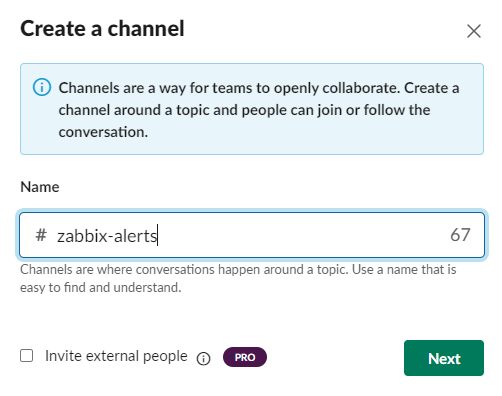
Step 2: Create Zabbix Channel
- Create a channel, you can name it anything
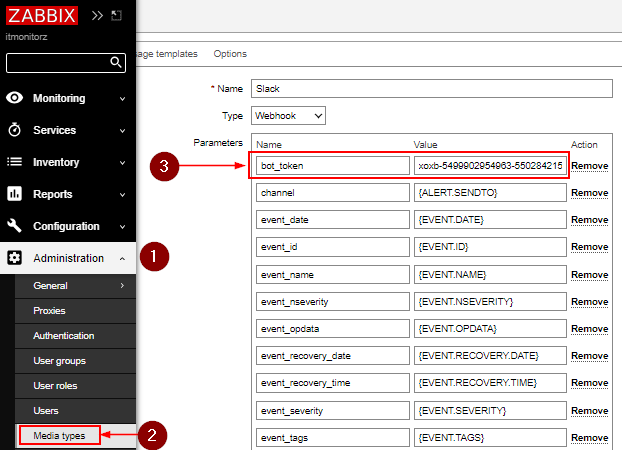
Step 3: Configure Zabbix Media Type
- Log in to your Zabbix server as an administrator.
- Go to “Administration” > “Media types” and click on “Slack“.
- Import template (to be updated)
- Add the OAuth access token obtained in previous step.
- Update the media type.
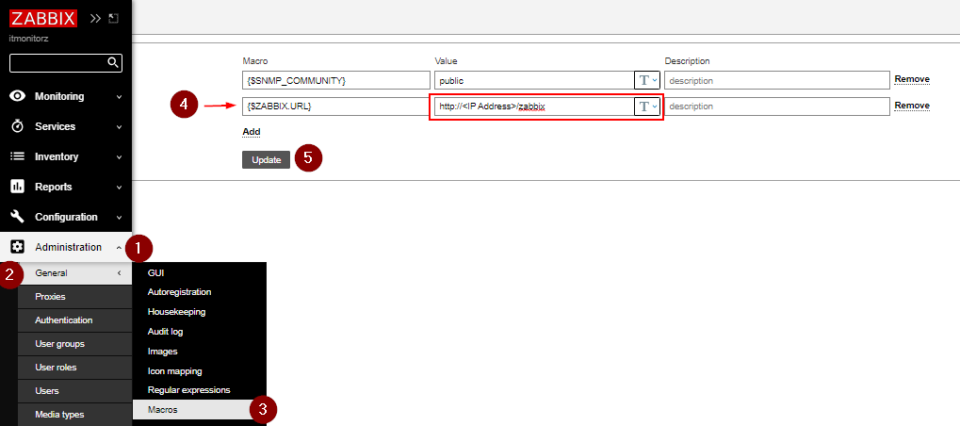
- Navigate to Administration > General > Macros and add Macro
Macro: {$ZABBIX.URL}
Value: Web URL of Zabbix
Step 4: Configure Zabbix Action:
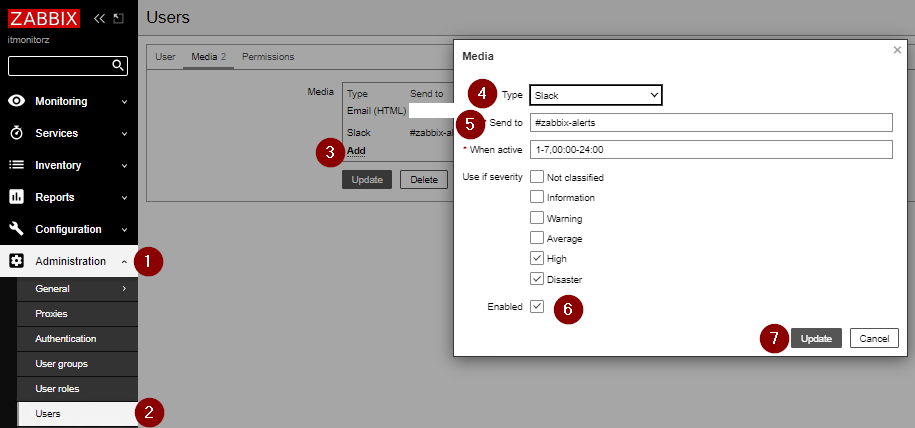
- Go to Administration > Users > Media
- In the “Media” tab, click on “Add” to add a new Media.
- Specify Slack Channel name created in Step 2
- Choose Severity to alert on Slack
- Click Update.
- Navigate to Configuration > Actions > Trigger Actions and Enable Report Problems to Zabbix administrators (via all media)

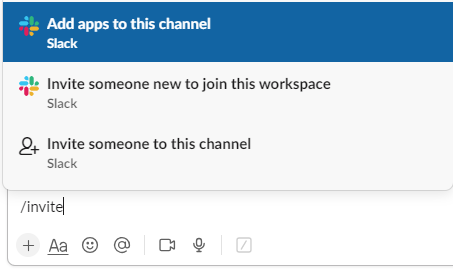
Step 5: Add App to the Channel
Step 6: Test the Integration:
- Trigger an event in Zabbix that matches the conditions of the action you created.
- Zabbix should now send a notification to the specified Slack channel.
That’s it! You have successfully integrated Zabbix with Slack. Notifications from Zabbix will be sent to the configured Slack channel based on the actions and triggers you’ve set up in Zabbix.
Troubleshooting:


Leave a Reply