Step 1: Install Maxmind
sudo add-apt-repository ppa:maxmind/ppa
sudo apt update
sudo apt install -y geoipupdate- Register in MaxMind and generate License Key
sudo geoipupdate- Check the version of geoipupdate that is installed
sudo geoipupdate -vStep 2: Prerequisite
sudo apt-get install -y python3-pip python3-virtualenv python3-dev libxml2-dev libxslt-devStep 3: Create system user
sudo mkdir /opt
sudo useradd parsedmarc -r -s /bin/false -m -b /opt
Step 4: Install parsedmarc in a virtual directory
sudo -u parsedmarc virtualenv /opt/parsedmarc/venv
source /opt/parsedmarc/venv/bin/activate
sudo -u parsedmarc /opt/parsedmarc/venv/bin/pip install -U parsedmarcNote: Ignore the installation error thrown for having incompatible version of urllib.

Step 5: Configure parsedmarc.ini file
[general]
save_aggregate = True
save_forensic = True

[msgraph]
auth_method = ClientSecret
client_id =
client_secret =
tenant_id =
mailbox = fscr@abc.com

[mailbox]
watch = True
delete = False

[elasticsearch]
hosts = 127.0.0.1:9200
ssl = True
Note: [elasticsearch] configuration will change at later stage of this documentation.
- Protect parsedmarc configuration file
sudo chown root:parsedmarc /etc/parsedmarc.ini
sudo chmod u=rw,g=r,o= /etc/parsedmarc.ini
Step 6: Configure parsedmarc as service
sudo nano /etc/systemd/system/parsedmarc.service
[Unit]
Description=parsedmarc mailbox watcher
Documentation=https://domainaware.github.io/parsedmarc/
Wants=network-online.target
After=network.target network-online.target elasticsearch.service

[Service]
ExecStart=/usr/local/bin/parsedmarc -c /etc/parsedmarc.ini
User=parsedmarc
Group=parsedmarc
Restart=always
RestartSec=5m

[Install]
WantedBy=multi-user.target
- Enable parsedmarc service
sudo systemctl daemon-reload
sudo systemctl enable parsedmarc.service
sudo service parsedmarc restart
Step 7: Install Elasticsearch and Kibana
sudo apt-get install -y apt-transport-https
wget -qO - https://artifacts.elastic.co/GPG-KEY-elasticsearch | sudo gpg --dearmor -o /usr/share/keyrings/elasticsearch-keyring.gpg
echo "deb [signed-by=/usr/share/keyrings/elasticsearch-keyring.gpg] https://artifacts.elastic.co/packages/8.x/apt stable main" | sudo tee /etc/apt/sources.list.d/elastic-8.x.list
sudo apt-get update
sudo apt-get install -y elasticsearch kibana- Enable and start services
sudo systemctl daemon-reload
sudo systemctl enable elasticsearch.service
sudo systemctl enable kibana.service
sudo service elasticsearch start
sudo service kibana start
Step 8: Configure Elasticsearch
sudo vim /etc/elasticsearch/elasticsearch.yml# Enable security features xpack.security.enabled: true xpack.security.enrollment.enabled: true # Enable encryption for HTTP API client connections, such as Kibana, Logstash, and Agents xpack.security.http.ssl: enabled: true keystore.path: certs/http.p12 # Enable encryption and mutual authentication between cluster nodes xpack.security.transport.ssl: enabled: true verification_mode: certificate keystore.path: certs/transport.p12 truststore.path: certs/transport.p12
- Set authentication in elasticsearch
cd /usr/share/elasticsearch/bin
sudo ./elasticsearch-users useradd <username> -p <password> -r superuser

echo "y" | sudo ./elasticsearch-reset-password -u elastic
echo "y" | sudo ./elasticsearch-reset-password -u kibana
echo "y" | sudo ./elasticsearch-reset-password -u kibana_system
echo "y" | sudo ./elasticsearch-reset-password -u apm_system
Troubleshoot: If parsedmarc service (sudo service parsedmarc status) does not start, look at error log using

 $2.75 per month
journalctl -u parsedmarc -r
Solution: To fix above error, update /etc/parsedmarc.ini file with the above credentials to connect to elasticsearch. (Do not use special characters in the password. Otherwise, refer documentation to incorporate special characters in the password)
[elasticsearch]
hosts = https://username:password@127.0.0.1:9200
ssl = True
Step 9: Configure Kibana
- Create self-signed certificate
openssl req -x509 -nodes -days 365 -newkey rsa:4096 -keyout kibana.key -out kibana.crt
sudo mv kibana.* /etc/kibana
sudo chmod 660 /etc/kibana/kibana.key- Add the following configuration
sudo vim /etc/kibana/kibana.ymlserver.host: "SERVER_IP" server.publicBaseUrl: "https://SERVER_IP" server.ssl.enabled: true server.ssl.certificate: /etc/kibana/kibana.crt server.ssl.key: /etc/kibana/kibana.key
Note: Do not configure Elastic Search in the kibana.yml file. We shall perform at later stage.
- Restart Kibana service
sudo systemctl restart kibana- Generate token to connect Kibana with Elasticsearch
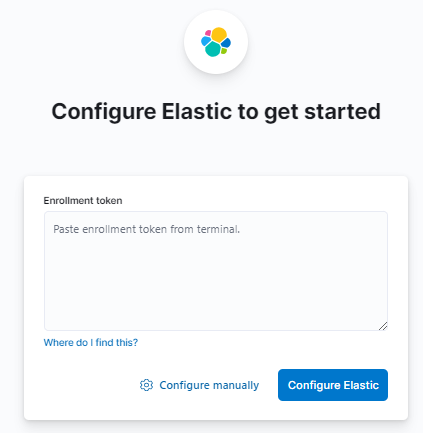
sudo /usr/share/elasticsearch/bin/elasticsearch-create-enrollment-token -s kibana
- Access Kibana service https://<IP>:5601
- Enroll Kibana in Elasticsearch
Then access to your web server at https://SERVER_IP:5601, accept the self-signed certificate and paste the token in the “Enrollment token” field.
- Copy verification code from Kibana server
sudo /usr/share/kibana/bin/kibana-verification-code
- Use kibana_system to authenticate with elastic search. kibana_system has certain inbuilt privielges to connect with Elastic search, so do not use any other user account.
Troubleshooting: Kibana service is running however port 5601 is not accessible

Solution:
sudo chown kibana:kibana /etc/kibana/kibana.key
sudo chown kibana:kibana /etc/kibana/kibana.crt
sudo service kibana restart
Leave a Reply