Helpful guide to setup one-to-one Static NAT in FortiGate firewall so all inbound and outbound traffic of the server (192.168.1.2) communicates via a specific Public IP address (180.151.48.34).
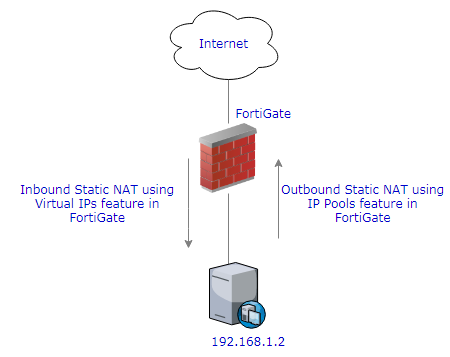
Inbound Static NAT
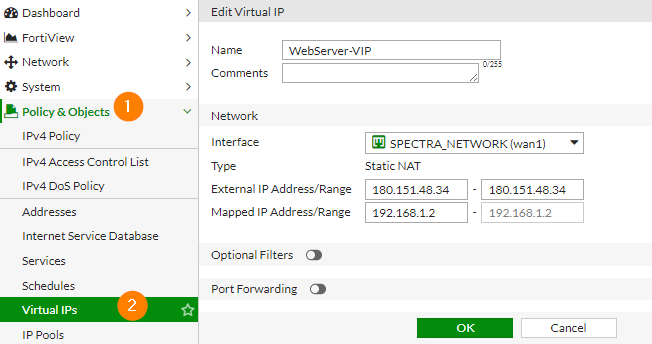
- Navigate to ‘Virtual IP’ menu under ‘Policy & Objects’ and specify Public (External) and Private (Mapped) IP address details in the fields. ‘Interface’ option refers to the interface to which Public IP address is connected to.
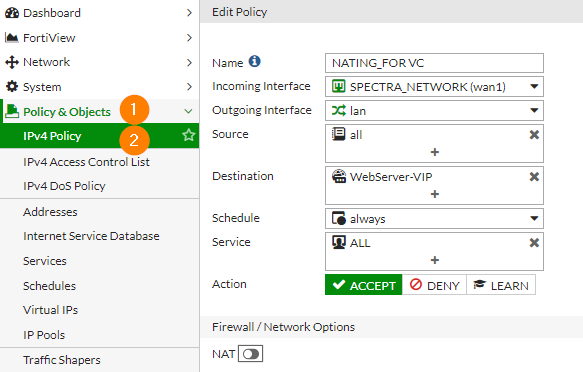
- Create a Security Policy to allow inbound traffic from external interface to ‘Virtual IP’ created in the above step. You must turn off the NAT, as the NAT process will be taken care by FortiGate Virtual IP configuration.
Outbound Static NAT
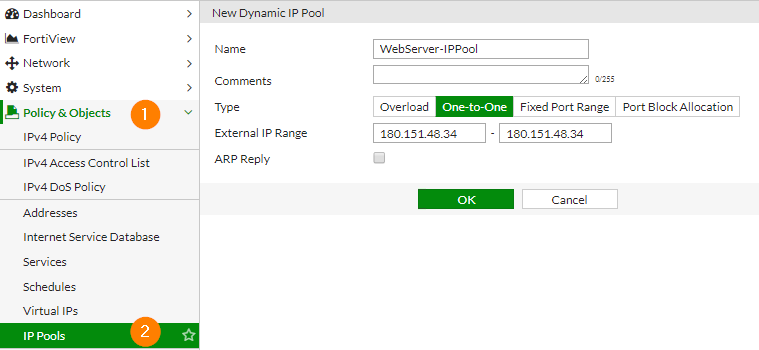
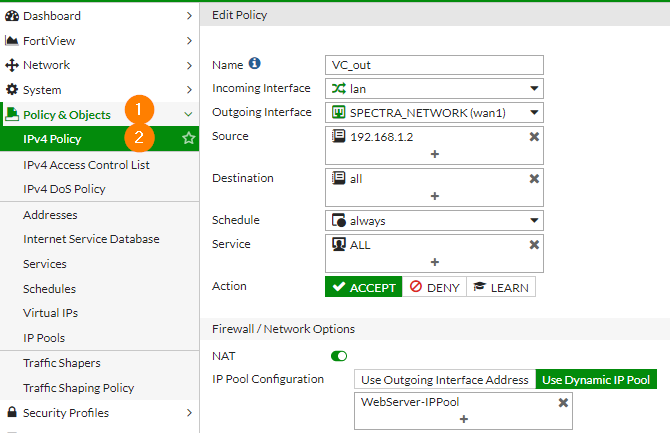
- Navigate to ‘IP Pools’ menu under ‘Policy & Objects’ and create a one-to-one NAT so that all outbound traffic from 192.168.1.2 communicates via 180.151.48.34 to internet.
- While creating Security Policy for outbound traffic, choose ‘Dynamic IP Pool’ option and select the IP Pool created in the above step.

Leave a Reply